When painting your house, one of the things you will want to avoid is having the paint come out streaky.
When you paint a wall, you should hope that it will stay looking good for at least a few years.
One of the ways to ensure this is the case is to do the job the proper way.
Although the primer is not your finished product, some people worry when the primer starts to get a little streaky on the wall.
If this has happened to you, let’s take a look at why that could be and if there is anything you could do about it.
Is Primer Supposed To Look Streaky?

Primer is not supposed to look streaky, but it is not going to matter all that much if your primer coat is not perfect.
Primer is almost like an adhesive as it takes the old paint on the wall and makes it a bit more susceptible to the new layer of paint that is about to be applied.
The best way to think about this is when you rub two smooth objects together.
When you do this, there is very little friction, and the pieces don’t stick to each other.
This can be the same way with something like primer, a smooth wall with a smooth new coat of paint may not be the best match.
However, if you put a coat of primer on first, it almost becomes a bit sticky to the top coat, and the paint will adhere much better.
In addition, when the paint adheres better, it will also cover better.
If the primer is done right, your top coats are going to look more complete, and therefore, you will find that your overall project comes out much better.
Chances are if your primer is coming out streaky, it really could just use another coat.
Don’t be afraid to put two coats of primer on in certain situations where the color that you are covering is very dark.
This will help to ensure that the color is completely covered, and you will know that with two coats of your top color paint, your project will come out perfect.
Primer paint is not always as high in quality as top coat paint, and therefore, it doesn’t always cover perfectly.
Don’t let this stress you out during your next painting project.
What Could Make Primer Look Streaky?

The most common reason for the primer to look streaky is that it is not the proper color or formula to cover the bottom layer of paint.
The coverage of the primer may simply not be enough with just one coat.
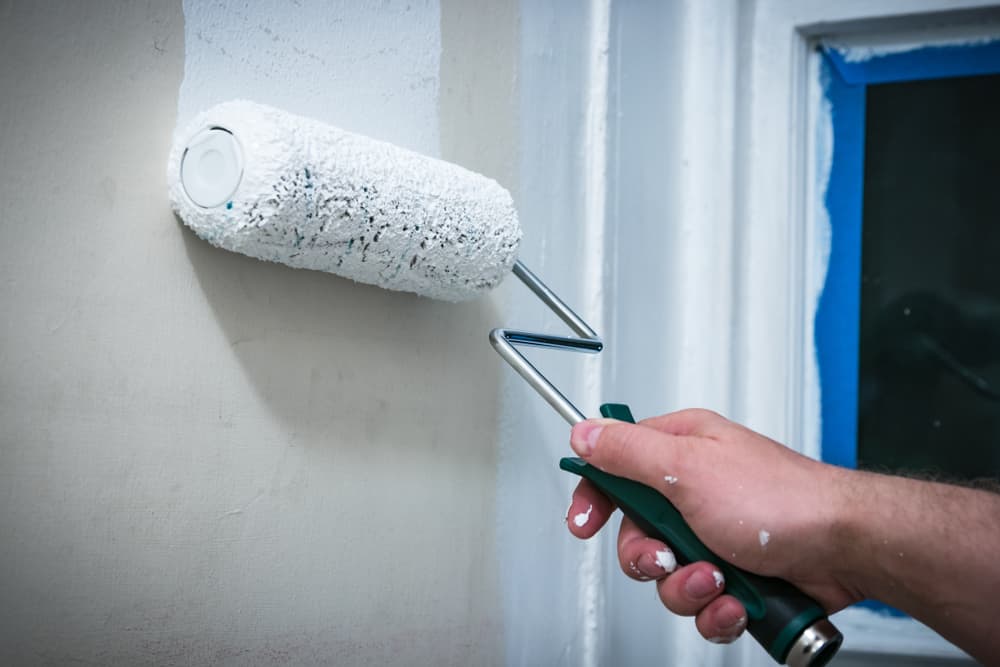
However, there is another reason that the primer can look streaky, and that is from improper paint technique.
If you are not careful as to how you are using your roller, it can come out quite streaky.
The most important thing to remember is that when you put paint on the wall, you need to spread it out.
When a roller filled with paint is applied to a wall, it will create clumps of paint on the wall.
You will end up with areas where the paint is much thicker than it is in other areas.
This, of course, leads to some issues with the overall look of the project.
We highly recommend putting the roller on the wall and then working in that one little section at a time.
Go across the initial section where you put the roller on the wall over and over again.
If you are able to do this, it will spread out the paint, and the paint can go up and down the walls quite smoothly.
Essentially, think of your job as a painter as more of a spreader than an applier.
Put the paint on the wall and then spend a lot of time spreading it.
If you leave these clumps of thick paint all over your house, you will have to sand them out and then paint over them.
Learning the proper brush and roller techniques before starting a paint job is essential.
How Do I Know if I Need Two Coats Of Primer?

Most of the time, you will need two coats of primer if you are going over a dark color or if the walls were in really bad condition prior to painting.
If the walls have a lot of areas that need to be patched over, then two coats of primer will help to cover those patched spots and get the wall looking smooth before you paint.
Most of the time, you will know if you need two coats before you start your project.
If you are going over navy walls and trying to paint the room white, we would say it’s a safe bet to assume you are going to need two coats of primer.
In addition, if you are rehabbing an old house, it’s essential to put two coats of paint on to make sure the walls have become smooth again.
Overall, primer is usually a bit cheaper than the top coat of paint.
Most painting professionals will tell you that they would rather use two coats of primer than three coats of the top coat.
Primer is usually quick to dry, and you can put two coats on in one day for some situations.
People who skip the step of using primer are asking for long-term issues with their painting projects.
You will notice chipping that happens much sooner, and there are areas of the room that will likely start to fade or look different rather quickly.
Painting with two coats of primer is a smart choice, even if it is a bit more time-consuming for your next project.
Should Primer Completely Cover Color?

When homeowners are new to painting, they tend to get very hung up on the idea that primer needs to cover the color on the walls completely.
This is really not true.
If you put on one or two coats of primer and the walls end up looking better but not completely covered, don’t let this stop you from moving on to the next steps.
You will have two more coats ahead of you for the top coat, and those are the final coats that will need to cover the wall completely.
Remember that priming is more about preparing the surface than getting the project to look perfect.
Keep your project moving along by getting your primer done and then going to the next steps.
Don’t get hung up on the idea that you will need to be stuck priming for the next few weeks until the walls are exactly perfect.
How Do You Fix Blotchy Primer?

Painting a room can be a really exciting change for your home.
Because painting makes such a significant impact and the change can happen so quickly, many homeowners are in a rush to get a painting project completed.
This, at times, can lead to a primer project that comes out a little splotchy or irregular.
If you have done a quick job of priming a room and now the project does not look all that good, it is time to think about doing a second coat.
Most of the time, a painting project should only need one coat of primer, but if you feel as though your first coat didn’t do the job that it should have, you can fix it by applying another coat.
It is also a good idea to make sure that your paint tools are the best that you can buy.
Depending on the type of wall you are painting, you may need to use brushes or rollers that match accordingly.
If you are using a roller that lets out too much or not enough paint, the blotchy look is going to be hard to fix.
Instead, we recommend making sure you talk with a local paint shop about your project and have them recommend which type of paint is going to be the best to use.
In addition, ask them about the best products to apply it with.
Do I Have To Use Primer?

We get it that priming the walls is going to add another long and difficult step to the process of getting your house painted.
Truthfully, most people who start a painting project can’t wait to get it done.
The sooner you can get the project done and get your furniture back in place, the better you will feel about your home.
Unfortunately, skipping steps like priming the wall is just not a great idea.
Although we told you that streaky primer is not that big of a deal, streaky paint on the wall is.
Most people don’t realize how important a paint job is until they see one done poorly.
When the paint is poorly done, the walls will stand out, and you will notice it.
Even worse would be if the paint were so poorly done that there are actually issues with it adhering to the wall.
You will notice that with most home improvement projects, when you take shortcuts, you will end up paying for it in the long run.
Do I Need To Blend Brush Strokes And Roller Lines?

Another issue that could make your primer look streaky is that you are using the brush too much.
Remember that a brush is used to cut in, and a roller is used to cover large sections of the wall.
Where the brush and the roller meet, you must blend those sections.
If you do not blend, then you will notice that there are lines or edges where the two different painting techniques meet.
The best thing to do is to apply the paint with the brush and then have a roller ready to help blend that in.
Always be sure to keep the roller somewhat away from the area you just cut in.
Rollers can’t get that same straight edge, so you must keep a little space between the roller and the molding or the edge that you are working on.
Most of the time, it’s best to work with a roller and a brush together as opposed to doing all the brushing and then doing all the rolling.
This is how paint jobs come out the best.
Conclusion
Hopefully, you now feel a bit better about your primer and how it is supposed to look as you work on your home repair projects.
The priming is an important part of the job, but it is not the finished coat.
Therefore, you must make sure that you spend the time on the final coat so that there are no issues with the overall look of your project when it is finished.
If you use the right paint and the right application tools, you should have your room looking great in no time.


Leave a Reply