
Texture on walls is a feature that is starting to go out of style.
For many years, people were paying money to have texture put on their walls, but now, they are paying to have it removed.
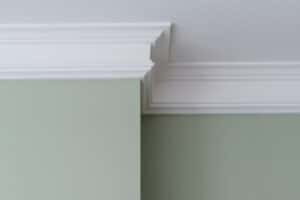
Removing texture from plaster walls can be quite a process, but it will be worth it if you want your home to have a more modern and cleaner look.
The texture on the walls was initially put into place to make it easier for homes to hide imperfections on the walls and ceilings.
Once you start removing it, there may be quite a bit of work to do to clean things up.
Let’s look at the steps to help you remove texture from plaster walls.
How to Remove Texture from Plaster Walls (Step-By-Step)

These are the steps we recommend for removing texture from plaster walls.
If you have not yet painted your walls with the texture on them, this process will be quite a bit easier.
If you have painted, you may end up with a larger project on your hands.
Make sure that you follow these steps carefully, and if at any time you feel as though you may do more damage than good, it is time to call in a professional.
Step 1: Gather Supplies

The first step in this process is to make sure that you gather all of the supplies you are going to need.
The supplies will help to make this process easier.
You will notice that the overall process of removing texture from the walls is going to be quite messy.
You will need to spend some time gathering supplies prior to getting started.
You are going to need a sanding pad, sanding screen, and a stepladder.
You will also need to make sure that you are covered and protected while working on this project.
The best way to do that is to wear a dust mask and have gloves and eyewear as well.
It’s important to remember that, when working with plaster walls, the process of removing this texture is likely going to take a bit more effort and work than if you were removing it from sheetrock.
Another essential thing to have in place is some bright lights for working.
There is no sense in scraping areas that do not need to be scraped.
Make sure you have ample light to see what you need to work on.
Here is a summary of the tools you will need before you start this process.
- Drop cloth
- Protective eyewear
- Stepladder
- Dust mask
- Sanding pad
- Scraper
- Bright lights
- Sanding screen
Step 2: Prep the Area

Next, you will want to take a drop cloth and cover the entire area.
It’s a good idea to tape the drop cloth down and cover any exposed trim if necessary.
When you take this coating off of sheetrock, you will be able to spray the walls down and scrape it off.
Unfortunately, when it comes to plaster, water does not do any good.
You will be doing quite a bit of scraping, and therefore, things will get quite dusty.
We recommend that you close the doors to any adjacent rooms to make sure that the plaster dust does not escape the room you are working in.
Step 3: Start Scraping

The best thing to do is to start sanding a small area to see how tightly the texture is stuck to the wall.
If the texture has never been painted, there is a chance that you will be able to pull it off in sheets.
You can try and get under a corner and start scraping it off in large sections.
You will be very lucky if it starts coming off in pieces like this.
When you start scraping the wall, you have to be very careful that your knife is not digging into the wall.
It is best to hold the knife at about a 30-degree angle.
When you hold it at a 30-degree angle, there will be much less digging into the wall and potential knicks and marks that you will need to clean up after the fact.
This is going to do more damage and potentially make it much harder to get the wall smoothed out when the process is complete.
Step 4: Smoothing

As you work your way around the room, you will continue to smooth the walls and break off these pieces of texture.
As the texture comes off, you will notice that it can sometimes leave a bit of residue behind.
It is fine to sand this down a bit but remembers that there will be a lot of dust involved.
If your walls were originally painted before you started this removal process, then you may be getting nowhere as the plaster starts to come off the wall.
The amount you remove will never get deep enough to get you back to a smooth wall.
If you are struggling with this process overall, there are some alternative methods for how to deal with this issue on plaster walls.
Alternative Options for Removing Texture from Plaster Walls

As we mentioned, it is not always easy or possible to remove the texture from plaster walls.
When you start scraping, you will pretty much know right away if this process is going to work or not.
If it is not going to work, you will be left with two additional options.
The two options are to replace the walls entirely or to float the walls.
1. Floating the Plaster Walls
With this option, you are going to cover up the entire finish and texture on the wall and get it to be smooth again.
This means that you will essentially be putting more texture on the wall and smoothing it out completely.
This process will be quite a bit easier than trying to scrape the texture off.
However, the problem is that you need to have some skill and ability to complete this project.
Floating walls is something that takes even the most talented tradesmen years to learn how to do.
You will have to work very hard to not only get the walls smooth but to get them level as well.
If there is an area where the plaster happens to be a bit thicker, you will need to work on smoothing that out to get the walls back to being flat.
The process is time consuming and potentially costly as well.
This is a job that we would recommend hiring a qualified professional to do.
You first have to make sure that it will not be more costly than you expect for it to be.
Essentially, it will be a toss-up as to whether it makes sense to do this or to replace the walls completely.
2. Replace the Walls
It may seem a bit over the top to bring up replacing the walls, but truly, it is sometimes the best option.
If you are dealing with texture on plaster walls that have been painted a few times over the years, you truly are better off replacing the walls.
When you remove the walls, you can then put up some sheetrock, which tends to be quite a bit easier to work with than plaster.
For the time and the effort it may take you to remove the texture, you probably would have been able to remove the walls and replace them entirely.
Don’t count this option out because it sounds like a larger project.
Truly, when it is done right, the project can be quite a bit simpler than scraping off the walls.
How Do You Fix a Bumpy Plaster Wall?

Maybe you have decided that you can live with the textured plaster walls, but you want to fix a few of the imperfections.
You can fix a bumpy plaster wall by skimming it.
This is very similar to the process we talked about above to make sure that you get the wall flat first.
You will use plaster to get the wall back to being straight and square, and then you can use something like a textured paint to add the texture back in.
Textured paint is a bit harder to work with than standard paint, and you may need to apply it a bit thicker and give it plenty of time to dry.
If your plaster walls are very uneven and starting to fall apart in areas, it truly is time to replace them.
Is Plaster Better Than Drywall?

In many older homes, it is very common to find plaster walls.
With the modern conveniences of drywall, many people think that plaster is not worth having.
There are, however, many advantages to plaster walls.
You just have to understand how to care for them.
To replace plaster walls for no reason does not make much sense.
If you need to replace it because of a texture that is too hard to remove, then that is understandable.
Plaster walls have quite a few advantages over drywall.
For starters, the plaster walls provide better insulation.
If you live in an area that has both cold and warm temperatures, you will find that the plaster walls do a better job of managing temperature and helping you manage your electric bill as well.
Another area where the plaster walls will shine is when it comes to fireproofing.
Although plaster walls are not going to prevent a fire completely, they are a bit better at keeping it under control than drywall.
Plaster walls also help to ensure that the rooms are more soundproof.
You will notice that the sound traveling from one room to another is much reduced in a house with plaster walls.
These are all very good benefits, and they keep people wanting to keep plaster walls in their home.
Plaster won’t get moldy because it cannot grow it and it is undoubtedly considered to be a higher end, more premium material.
Of course, the problem is that it is hand applied and can be quite difficult for the average person to work with.
Repairing a hole or a break in drywall is a bit easier for the average homeowner to manage.
It also seems to be easier to get the texture to come off of drywall than it is to get it to come off of the plaster walls.
Regardless of what you have in your home or what you decide to keep in the long term, it is important to know the differences and understand both the positives and the negatives.
How Long Do Plaster Walls Last?

Plaster walls are built to last close to 70 years.
Of course, there are environmental issues which can make them deteriorate quite a bit quicker.
The shortest amount of time you will find a plaster wall to last is around 30 years.
Most homeowners will never have to replace walls in their home unless they take on major construction projects or have any type of water damage.
It is also quite common for drywall to last about as long as plaster will last.
Don’t choose a wall or wall covering based on longevity.
Both options are intended to last for quite some time and should give you the time that you need out of them.
Conclusion
As you can see, removing the texture from plaster walls is not a very fun job.
Some issues will come up that can make this nearly impossible.
If you know that there are several layers of paint covering the walls, you will likely need to consider an alternative.
Try to use a contractor who can float or skim the walls, or simply have the walls replaced.
The best option here is to learn to like the texture.
This, of course, may take an open mind and a bit of understanding on your part, but it will undoubtedly be the cheapest and easiest way to handle this mess.
If you decide this process is for you, always start in a small section that is hidden by furniture.
If things are going well, you can keep moving on, but if it does not work well, you can choose another option.


Leave a Reply