
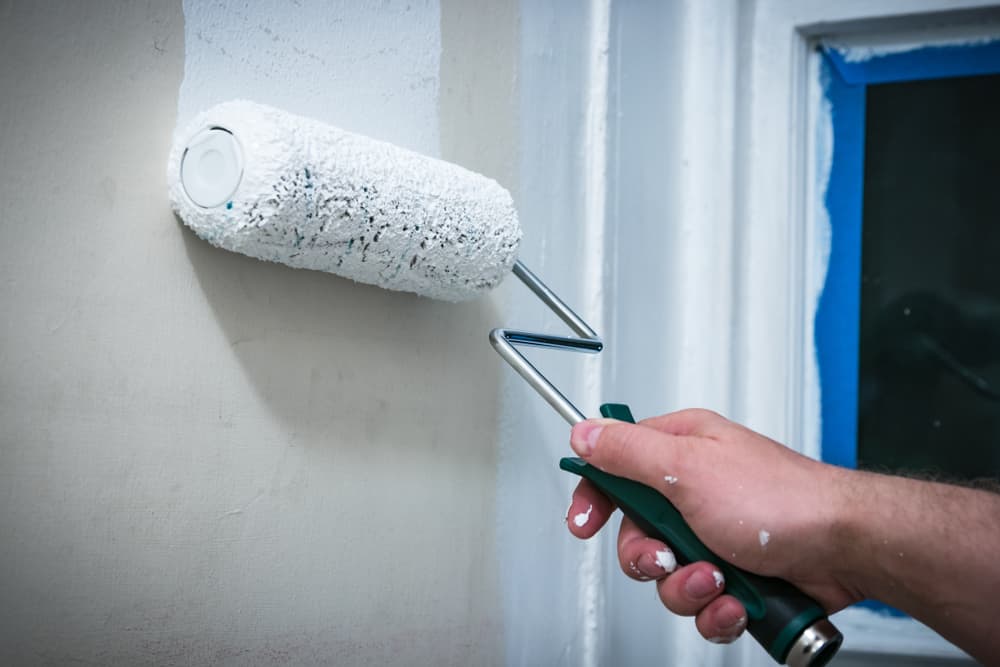
If you’ve ever done any kind of drywall work, then you know how messy it can be.
Dust scatters everywhere and clings to everything.
One of the worst places it can cling to is your painted walls.
Luckily, there are a few ways you can clean drywall dust off of painted walls.
How to Clean Drywall Dust Off Painted Walls (Step-By-Step Guide)

There are three methods that one can use to clean drywall dust off painted walls.
We’ll go over those methods and steps as well as offer more tips on how to prevent drywall dust in the first place.
Method 1: Vacuum The Wall

The floor isn’t the only thing that your vacuum can clean.
It can also be used to clean your walls.
Vacuuming the drywall dust is an effective way to get rid of it.
The suction from the vacuum pulls the dust from the surface of the wall.
It then traps the dust inside of the vacuum’s canister.
Follow these steps to use a vacuum to clean drywall dust off painted walls.
Step 1: Attach Dusting Brush To The Vacuum
Most vacuums come with a dusting brush.
The brush is useful in patting down and prying off the dust from objects.
It’s especially useful for removing drywall dust from the wall.
Attach the dusting brush to the hose of the vacuum.
If your vacuum doesn’t have a dusting brush, then any kind of cleaning tool with a brush will work.
If you don’t have any cleaning tools, then the hose of the vacuum will also work.
You may need to run the hose a few times over the surface to compensate for not having a brush.
Step 2: Start Vacuuming From Top To Bottom
Turn your vacuum on and start sucking up the dust from the top of the wall.
Move vertically down the wall until you reach the bottom.
You’ll see a clean line of the wall without the dust on it.
Follow this pattern along the entire length of the wall.
Sometimes you have a choice when it comes to the suction power for your vacuum, too.
On a high setting, the vacuum will provide more suction power.
This will allow it to suck up more dust, especially in stubborn areas.
The problem is that it also means some dust may blow away from the sheer power of the vacuum.
You’ll have to clean those areas again later.
On a low setting, you’ll need to clean the same area a few times to remove all the dust.
The benefit is that less dust scatters.
Choose the right power mode for the kind of cleaning that you want to do.
Step 3: Rub Black T-Shirt On The Wall
When you think you’re done, it’s time to perform the black t-shirt test.
Take a clean black t-shirt and rub it along the wall.
If it comes away clean, then you’re done cleaning.
If you still see the dust on it, then you need to keep vacuuming.
Repeat the steps as needed.
Step 4: Empty The Trash Outside
A mistake that some homeowners make when using a vacuum to clean drywall dust is that they empty their vacuums inside the home.
This has a chance of letting the dust spread through the air.
You may find yourself needing to clean up the dust again.
A better solution is to take a trash bag outside.
Then take your vacuum outside and empty it into the trash bag in your yard.
Place the trash bag in your outside bin for pick up.
Don’t take the bag inside the home.
Clean the vacuum out in the yard with a garden hose.
Don’t bring the vacuum back inside of the home until every speck is gone.
This step will ensure that the vacuum doesn’t cross-contaminate other parts of your home with drywall dust.
Method 2: Wipe Down With A Microfiber Cloth

If you don’t want to use a vacuum or you don’t have one, then an inexpensive method is to use a microfiber cloth.
The great aspect of microfiber cloths is their ability to capture and trap dust.
Depending on the size of the wall and the amount of dust, you may need to use a few microfiber cloths to clean the area.
Follow these steps to use a microfiber cloth to clean drywall dust off of painted walls.
Step 1: Choose The Right Microfiber Cloth
There are several different types of microfiber cloths on the market.
The one you need to clean drywall dust is thick and large.
Thick microfiber cloths last longer.
If they’re larger, then that also means you have more surface area to use.
If you have several walls that need cleaning, then you should buy a few packages of cloth.
You don’t want to have to stop because your cloth is filthy and needs washing.
Step 2: Work From Top To Bottom
Just like with vacuuming, you’ll need to start from the top of the wall and work your way down.
Some of the dust will trap itself within the cloth.
The rest will fall to the floor.
Because of this, it’s a good idea to lay a tarp down on the floor.
It will catch any dust that falls to the floor.
If you don’t have a tarp, then you’ll need to vacuum the floor later.
While you’re wiping down the wall, scrub downwards.
You want to force the dust downwards rather than rising where you just cleaned.
Once you reach the bottom of the wall, don’t forget to scrub the baseboard.
There’s likely a lot of dust piling on top of it or on its edges.
Switch out the cloth whenever it becomes too dirty.
If you wipe down a wall with a cloth that’s covered in dust, then you’re only spreading more dust on the wall.
Step 3: Wash The Cloth In The Washing Machine
One of the best aspects of using microfiber cloths is that they’re reusable.
You just need to clean them.
When you’re done wiping down the wall, you need to wash the cloth.
Avoid shaking out the cloth on the way.
It will shake the dust off and spread it through the rest of your home.
Carefully place the cloth in the washing machine.
Don’t wash it with other clothes.
Turning the washing machine on and let the water and detergent clean your cloth of drywall dust.
If it’s still dirty when you take it out, then you can put it through another cycle.
Take the additional step of cleaning the washing machine when you’re done.
This can ensure there’s no trapped dust inside the machine.
Method 3: Dish Soap And Water

This method works best for painted walls that don’t react to water.
You should first test a small area and see how your painted wall reacts to dish soap and water.
If the paint doesn’t bleed, then you can proceed with the method.
If the paint does run, then do not perform this method.
Dish soap and water is a great way to remove drywall dust because it helps it lose its adhesion to the wall.
Drywall dust is sticky.
It clings to walls especially well.
Follow these steps to use dish soap and water to remove drywall dust from painted walls.
Step 1: Mix Dish Soap Into A Bucket Of Water
You’ll need two buckets of cool water for this method.
Don’t use warm water.
While warm water can sometimes clean certain messes easier, it may react with your paint.
Warm water is also problematic for drywall.
It can lead to mold growth.
Pour some mild dish soap into one of the buckets of water.
Then mix it together until it’s soapy.
Leave the other bucket alone.
Step 2: Dip Sponge Into The Soapy Bucket And Scrub
Use a large sponge and dip it into the bucket with the dish soap.
Squeeze out the sponge to remove the excess water.
You’re not looking to soak your walls with water.
You want to use the water to make the dust lose its adhesion to the wall.
As with the other steps, start at the top.
Then work your way down the wall.
Scrub in vertical lines.
Step 3: Rinse Sponge Thoroughly
Each part of the wall needs to be treated with soapy water.
Then it needs a rinse.
You can use another sponge to rinse the wall, or you can rinse the original sponge as well.
Either way, you need to rinse the wall with a clean sponge.
Start at the top and move your way down to the baseboards.
The rinse will also remove the dust clinging to the sponge.
This is important because it ensures you’re not spreading wet dust across the wall.
Step 4: Change The Water As Needed
With all the dust you’re washing off, you’re going to need to change out your water.
Using the same water for the entire project increases the chance of rubbing more dust onto the wall.
Once the water starts to change color, it’s time to change it.
With fresh water in your buckets, you can continue to remove dust from the wall.
Step 5: Perform The Black T-Shirt Test
When the walls are dry, it’s time to see if you need to keep scrubbing.
As described before, rub a black t-shirt along the wall and check if there is dust on it.
If you see dust, then you need to break out the buckets again and return to scrubbing.
Otherwise, the walls are clean.
Step 6: Wipe Baseboards And Floor
During the cleaning process, dust likely ended up on the floor and on your baseboards.
The final part of the wall you should clean is the baseboard.
Scrub the sponge into the baseboard to remove the dust.
Then either scrub the floor or use a vacuum to pull up the dust there.
Step 7: Clean Up
Pour the water outside.
You don’t want to pour it inside of your sink and have dust lingering on its surface.
You should either throw out your sponge or rinse it until it’s completely clean.
You certainly don’t want to use the sponge for another cleaning project and end up spreading drywall dust.
How To Reduce Drywall Dust On Your Painted Walls

The easiest way to clean drywall dust off of your painted walls is to reduce the amount of dust in the first place.
These tips can help you reduce the drywall dust in your home when you do a project.
1. Barriers

One of the most effective ways to reduce drywall dust is to prevent it from touching the surface with barriers.
Plastic tarps are an inexpensive barrier that can cover any surface.
You can attach them to your walls in areas where you’re not working.
The tarp will catch the dust and keep it from sticking to the wall.
They can also attach to your ceilings and flooring to make the clean-up even more effective.
The tarp needs to have zero holes or puncture wounds.
Even one hole can allow dust to fall through it and spread to the surface below.
Once you’re done with the project, you need to gently remove the tarp from the area.
For tarps on the wall, first, take the bottom and hold it up.
Then have someone else detach the tarp from the top of the wall and hoist it down to you.
Between the two of you, press each opposite corner of the tarp against each other.
You’ll fold the tarp in half.
The dust will settle at the bottom.
Then you can carry the tarp through the home without letting the dust escape.
Follow the same process for any other tarp in the room.
Once outside, either throw the tarp away or wash it with a garden hose.
2. Use Fans

Barriers can be even more effective when you also use fans.
Large fans that blow heavy air can also blow dust from a room.
You’ll need an open window or exterior door for this method to be effective.
Aim the fan at an open window or exterior door.
Then turn it on while you work.
Any drywall dust that you kick into the air will blow out through the window or door.
It works well with barriers because if any dust escapes the channel of air, then the barrier can catch it.
Any time you’re done using the fan, clean off the blades.
Some dust has likely settled on them.
3. Invest in Low-Dust Drywall Compound

Low-dust drywall compound is an effective alternative to standard drywall compound.
Instead of leaving behind dust that’s like particulate dust, it’s heavier.
The low-dust drywall compound has dust that is like sawdust.
It’s thicker, heavier, and easier to clean.
It’s also just as effective as a standard drywall compound.
When the dust is thicker, it’s easier to clean because you’re able to see it.
It collects better on the cloth and is easier to suck up with the vacuum.
Because it’s heavier, it also tends to fall off of the ceiling and the walls.
You’ll have less to clean off the walls and can get by with a plastic tarp on the floor for the rest of the mess.
The problem with low-dust drywall compound is that it’s more expensive.
If you have it in your budget, then you should consider making the switch.
It can make cleaning drywall dust off painted walls simpler.
4. Wet Sand Drywall Joints

It’s common practice to dry sand drywall joints.
It’s faster and less laborious than other methods.
However, if you want to prevent drywall dust from sticking to your painted walls, then you may want to wet sand the drywall joints instead.
Wet sanding helps soften the joint.
That makes it easier to clean, shape, and even remove.
The process takes time which makes using it for large rooms difficult.
However, it does produce less drywall dust.
If you have the time and don’t mind putting extra work into the project, wet sanding your drywall joints can make the clean-up a lot easier.
5. Invest In A Drywall Vacuum Sander

Sanding is one of the biggest reasons drywall dust gets everywhere.
The process of sanding tears the surface away to create a smooth surface instead.
Because drywall dust is already grainy and loose, it flies everywhere.
You can make the sanding process cleaner by investing in a drywall vacuum sander.
This is a sander that attaches to your wet-dry shop vac.
One hose connects to the sander while the other drains into a bucket of water.
As you move the sander over the joint or drywall, the vacuum sucks up the dust.
It’s taken through the vacuum, through the hose, and then empties into the bucket of water.
The water traps the dust and keeps it from spreading through the rest of the room.
Using the sander can be difficult for inexperienced homeowners, but the results are incredible.
Use a drywall sander with barrier protection to keep dust off of your walls.
Can You Paint Over Drywall Dust?
You may not want to deal with removing the dust from your walls at all.
That isn’t a good idea.
Some people will say that when paint mixes with the drywall dust, it creates a stronger surface.
Whether that’s true or not, the aesthetic won’t be pleasing.
The drywall dust creates a thin film on the surface of the wall.
It blocks the paint from adhering to the wall.
As a result, you see an uneven coat of paint.
Some of the paint may even flake off because it can’t hold onto the wall.
Painting over the drywall dust will never work.
You need to clean it off first using the methods previously described.
Should You Clean Your Walls Before Painting?

Modern paint does a great job of adhering to walls on its own.
However, you can make the paint stick to the surface of the wall better by cleaning it first.
Using any of the methods above can clean the wall to the point where paint can be spread on it evenly.
Leaving dirt or dust on the wall can interfere with how well the paint sticks to it.
It can also impact the color of the paint.
Dirt can smear and turn the paint to a ruddy color.
Dust can mix with the paint and spread across the wall.
You’ll end up with paint that looks like it’s flaking.
You should always clean your walls before painting to achieve the best results.
Conclusion

Drywall dust can be a pain to clean.
However, it’s important to clean the wall to keep your paint looking fresh and vibrant.
The methods described in this article can clean drywall dust from your walls and make them look fresh again.
Using a few preventative measures can also reduce the amount of dust that you need to clean up later.
Consider these methods before you start your next home improvement project to save on time and money.


Leave a Reply