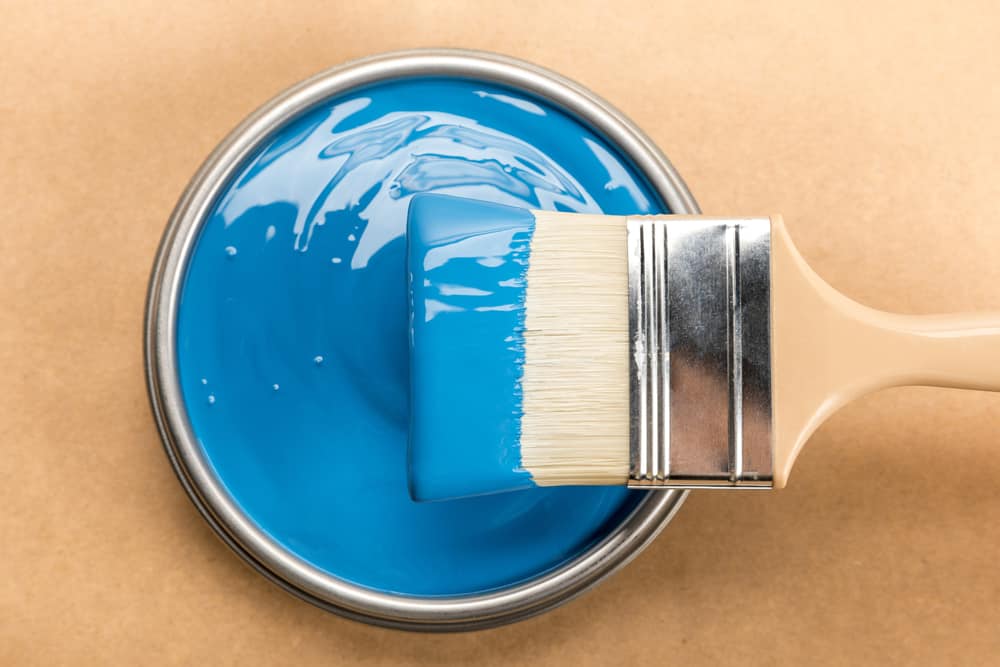
Sprucing up your home can be as easy as adding fresh paint to the walls.
You may run into a problem if you want to use enamel paint over latex paint.
Before your project ends up becoming messy, you need to know if you can paint enamel over latex paint.
Here’s what we discovered.
Can You Paint Enamel Over Latex? (Everything To Know)

Yes, you can paint enamel over latex, but it requires a lot of work and preparation of the surface.
Latex is a flexible paint which means paint sticks to it more easily.
If you don’t prepare the surface beforehand, then the paint job can look crumbly and splattered.
The best way to prepare the surface for enamel painting is to sand the surface down to roughen it.
You can also apply a sealer or primer to create a layer between the latex and enamel paint.
How To Paint Oil-Based Enamel Over Latex Paint

To paint enamel over latex, you need to make the surface rough enough that paint can adhere to it.
At its current state, latex paint covers the surface.
Since you’re attempting to paint an oil-based enamel over it, the oil-based pigments will struggle to adhere to the pigments on the latex paint.
The oil and water-based paints don’t mix well.
Follow these steps to paint oil-based enamel over latex the right way.
1. Sand The Surface

Start by using 80-grit sandpaper and running it over the surface.
Apply enough pressure to damage the paint job.
You’ll know you’re doing it right when the surface has a matte appearance.
This step can take some time if you’re doing it by hand.
2. Sand With Finer Paper

Once the surface looks matte, you need to replace your 80-grit sandpaper with 150-grit sandpaper.
This is even finer sandpaper that will help sand down stubborn areas where latex is still clinging.
Continue to rub the sandpaper into the surface until it looks matte and smooth.
3. Remove The Dust

Before you can start painting, you need to get rid of the dust.
You can do this the easy way by sucking up the dust with a vacuum.
You can also use a blower to blow the dust from the surface.
If you leave the dust on the surface, then it will mix with the enamel.
You’ll have a permanent dusty-looking surface.
4. Prepare The Area For Painting

One more step to take before painting is to prepare the area.
Painting with oil-based enamel is messier than with latex.
It spreads further and is a bit looser.
Lay down masking tape on the edges to keep the paint from spilling in those areas.
Tarp down floors, ceilings, and furniture pieces in the room to avoid paint getting on them.
If you’re painting a wall, then you may want to remove the baseboard to make it easier to avoid painting them.
5. Prime The Surface

You’ll need two different primers to prime the surface for painting.
The first is an adhesion primer.

It will help the second primer stick to it as well as the enamel paint.
This primer is necessary because it provides a layer of coverage over the existing latex paint.
Without it, the enamel might have a difficult time sticking to the surface.
This primer can also be useful for setting down a base coat if you can find it in the color that you want to use.
Use a small brush to apply the adhesion primer to the edges of the surface.
These are the areas where enamel has the most problems sticking.
If you’re painting a wall and kept the baseboard on, then brush the primer on the top of the baseboard, too.
For joints and door openings, brush the adhesion primer into the joints and in the corners of doors.
Let the adhesion primer dry.
Once it’s dry, you’ll want to use the second primer.
This is a water-based acrylic primer.
This type of primer is something that both enamel and latex stick well to.
The goal behind this primer is to create a layer between the latex and the new enamel layer.
The primer layer should go on smoothly thanks to the adhesion primer applied earlier.
Use a fresh brush to generously brush the second primer over the surface.
Don’t leave any drips behind and keep it tidy.
However, you should have a generous and thick layer on the surface.
The thicker the layer is, the better the enamel will bond to the surface.
This primer acts as a sealer as it seals the latex beneath it.
Let the layer dry, then apply another coat of the second primer.
Go over every inch with the primer until you cover everything in it.
6. Paint First Coat

Once the primer is dry, you can start on your first coat of paint with enamel.
Use a small brush to first test the enamel on a small part of the surface.
If it spreads evenly, then the primers are doing their work.
If you notice that the paint looks off, then pause and apply another layer of the second primer.
Then test it again.
If everything seems to be bonding well, then you can continue to paint over the surface.
This is going to be your base coat of enamel paint.
Because of that, you need to cover everything with it.
Use a smaller brush, if needed, to paint the inside of corners and hard-to-reach areas.
Once the first coat is on, you need to let it dry.
Overnight is always the best option.
After it’s dry, you need to take 80-grit sandpaper and lightly sand it down.
You’re not trying to remove the paint.
You want to rough up the surface only a little bit.
If some paint comes off, then that’s fine.
7. Apply The Second Coat

With the surface marred, you can come in with the second coat.
Before you start painting, make sure you blow the dust from the surface.
Marring the surface ensures that the enamel can get into the areas that the previous coat couldn’t bond to.
Taking your brush, apply the second coat of enamel paint.
Don’t miss any spots.
Let it dry, then revisit the surface later to see how the enamel paint looks.
You may need to apply a few more coats, especially if the latex paint was a darker shade than what you’re using now.
If it looks great, then you can remove the masking tape and tarps, replace the baseboards, and admire your enamel-covered surface.
Tips To Paint Enamel Over Latex

There are a few tips you can use to make painting over latex with enamel paint easier.
Here are a few of those tips.
1. Use Air Conditioning

Keeping a room air-conditioned can make painting a lot easier.
Cool air helps enamel paint dry faster.
It can speed up the process and ensure that the paint is drying well.
Air conditioning can also help spread the fumes from the room.
This can keep the area a bit safer to work in since the fumes aren’t trapped in the room with you.
Keeping the room at an optimal temperature can also help the enamel bond well.
Considering that it’s already going to have a difficult time bonding with latex paint, you’ll want to do everything you can to make the environment friendly towards enamel paint.
2. Use Ventilation

Open up the windows in the room to ventilate it.
This is primarily a safety step to take.
If you lock yourself in a room without ventilation, then you’re allowing those fumes to stay with you.
Even if you’re wearing a mask, the fumes can get to your eyes.
Opening up a window and turning on a fan can help create a crosswind with the air conditioning.
It can remove fumes from the area and make working in the room a lot more tolerable.
Enamel is especially smelly, so using ventilation can help reduce its odor.
3. Wear A Mask

Another safety tip to consider is to wear a mask while you’re painting.
Enamel paint fumes are especially toxic.
Even if you’re doing a small job, you need to wear a mask.
Sanding the first coat of enamel can also cause you to inhale enamel dust.
Avoid making yourself ill by wearing a mask.
4. Clean Brushes

Any time you’re done using a brush or plan on switching between another brush, you need to clean it.
Cleaning your brushes can extend their lifespan.
How you use the brush also impacts how much cleaning you need to do.
A common mistake is that painters will load their entire brush with the paint.
That includes loading paint to the very base of the bristles.
That is a bad habit to start.
It can damage the brush and decrease its lifespan.
It’s also more difficult to clean the brush at that depth.
A better way to paint with the brush is to use the very tip and load the paint there.
Cleaning the brush is easier and you have better control over the paint.
If you plan on switching between the latex and enamel paint, then you need to use different brushes for each one.
Never mix the two paints if you can avoid it.
After you clean your brushes, let them fully dry before using them again.
If there’s water on the brush, then there may be remaining paint on it.
Water can also impact the quality of the paint and its ability to bond to a surface.
5. Use More Primer Coats

The more coats of primer that you put down, the better.
The thicker the primer layer is, the easier the enamel will stick to the surface.
You’ll want to add more layers with the second primer rather than the first primer.
Only use more coats of the first primer if the second primer isn’t bonding well to the surface.
With a thicker coat of primer, the enamel has less of a chance of mixing with the latex paint.
If you’re using a primer in the color that you want, then it can also make painting over the latex easier.
When you come in with the first base coat of your enamel, it has less of a job to do in blocking out the pigments from the latex paint.
In the case of primers, more is always the better option when painting over latex with enamel paint.
How Can You Tell If Your Paint Is Oil-Based Or Latex?

Before you decide to paint over something, you need to establish what kind of paint it is.
You may unknowingly try to paint over enamel with latex paint.
That’s never a good thing to do.
There’s an easy way to tell the difference between oil-based paint and latex paint.
You need to buy denatured alcohol and a rag.
Apply some denatured alcohol to the rag.
Then lightly rub the rag along the surface.
Take a look at the rag and examine it for signs of paint.
If you see paint, then you know the paint on the surface is latex.
That’s because denatured alcohol will remove latex from a surface, but it won’t interact with oil-based enamel paint.
Knowing what kind of paint you have can help you determine what steps to take to either remove it or paint over it.

Should You Paint With Oil-Based Enamel Or Latex Paint In Your Home?

Before you decide to paint over latex with enamel, you may wonder if enamel paint is what you actually want to use.
Which type of paint is better for use in your home?
The answer is dependent upon how you intend to use the surface.
Here are a few things to keep in mind when deciding if you should paint with enamel or latex.
1. Surface Usage

How much use does the surface see?
If it’s an interior wall, then it likely isn’t touched a lot.
In this case, latex paint is a better option.
It lasts longer than oil-based enamel and maintains its color well.
If the surface does see a lot of use, like doors, then using oil-based enamel paint is a better option.
This type of paint holds up well against abuse.
It’s stain-resistant, so you don’t have to worry about grubby fingers marring the color.
Because of its durability, enamel paint is also useful for outdoor furniture pieces.
The water won’t wash away the enamel after it’s sealed.
Enamel is also ideal for metallic objects that see a lot of use or handling.
2. Safety Concerns

There are a few safety concerns you should keep in mind when choosing between enamel and latex paint, too.
Enamel releases more VOCs, or volatile organic compounds, into the air.
VOCs can make it difficult to breathe, irritate your eyes, and some can even cause cancer.
That might make using enamel a problematic choice for health-conscious families.
Latex doesn’t release VOCs into the atmosphere.
It’s safer to use.
3. Longevity

Latex lasts longer than enamel paint.
As it ages, enamel paint has a tendency to yellow.
Even shades like blue or black can start to yellow at its edges and sallow.
You’ll need to paint the enamel over again to keep it fresh.
That isn’t the case with latex.
It holds its color well through the years and doesn’t yellow.
It’s great for both interior and exterior painting.
Whereas enamel will lose its gloss or shiny finish over the years, latex will continue to look great.
That may make a difference for a home that doesn’t want to put too much maintenance into its painted surfaces.
If you want one less thing to maintain, then you need to go with latex paint.
4. Shrinkage

One problem latex does have is its tendency to shrink as it dries.
You’ll need to use more paint than you think to keep the edges covered.
That means that the initial application of latex can be more difficult than enamel.
You’ll need to go back a few times to ensure every edge has paint.
Enamel paint doesn’t shrink.
It holds its shape and sticks to the surface.
The problem with enamel paint is that it can be difficult to clean up.
It tends to be messier than latex paint.
5. Smooth And Rough

One final factor to consider when choosing between enamel and latex paint is its appearance.
Enamel paint is smoother than latex paint.
It tends to have a glossier finish, although you can find matte finishes, and has a sleeker appearance.
Latex is a bit rougher.
It can be a bit thick in some places which can create edges if you’re not careful.
If you want a smooth paint job, then you may want to consider using enamel paint.
Conclusion

It’s possible to paint enamel over latex, but it requires you to sand the surface first.
You’ll also need to apply several layers of primer to create a thick layer between the latex and enamel.
You should also decide if using enamel paint is the best choice for your needs in the first place.
In some cases, latex paint may be a better choice.
Consider the steps and tips above to paint enamel over latex the correct way.


Leave a Reply